FTF! Happened to be in the city centre eating my sandwiches and looking at my phone when the alert came in: new cache, less than a kilometre away! Hopped on my bike and bombed it down
to find this wonderfully subtle cache. Tweezers would definitely have helped here, but a safety pin that I happened to be carrying worked pretty well too. Nice cache, hope it lasts!
TFTC.
This is the second in a three-part blog post about telling stories using virtual reality. Read all of the parts
here.
I’m still waiting to get in on the Oculus Rift and HTC Vive magic when they’re made
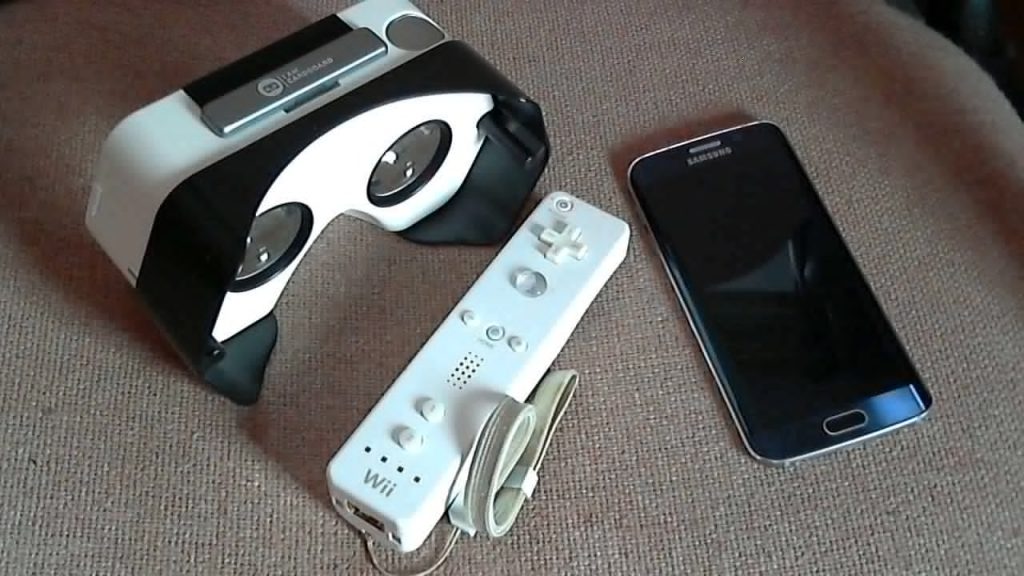
generally-available, later this year. But for the meantime, I’m enjoying quite how hackable VR technologies are. I chucked my Samsung Galaxy S6 edge into an I Am Cardboard DSCVR, paired it with a gaming PC using TrinusVR, used GlovePIE to hook up a Wii remote (playing games with a keyboard or even a gamepad is challenging if your headset doesn’t have a
headstrap, so a one-handed control is needed), and played a game of Gone Home. It’s a cheap and simple way to jump into VR
gaming, especially if – like me – you already own the electronic components: the phone, PC, and Wiimote.
My VR system is more-ghetto than yours.
While the media seems to mostly fixate on the value of VR in “action” gaming – shoot-’em-ups, flight simulators, etc. – I actually think there’s possibly greater value in it more
story-driven genres. I chose Gone Home for my experiment, above, because it’s an adventure that you play at your own pace, where the amount you get out of it as a story depends
on your level of attention to detail, not how quickly you can pull a trigger. Especially on this kind of highly-affordable VR gear, “twitchy” experiences that require rapid head turning
are particularly unsatisfying, not-least because the response time of even the fastest screens is always going to be significantly slower than that of real life. But as a storytelling
medium (especially in an affordable form) it’s got incredible potential.
Nothing quite gives you a feel of the human scale of the Hong Kong protests like being able to look around you, as if you’re stood in the middle of them.
I was really pleased to discover that some content creators are already experimenting with the storytelling potential of immersive VR experiences. An example would be the video
Hong Kong Unrest – a 360° Virtual Reality Documentary, freely-available on YouTube. Standing his camera (presumably a
Jump camera rig, or something similar) amongst the crowds of the 2014 Hong Kong protests, the creator of this documentary gives us a great opportunity to feel as though we’re standing
right there with the protesters. The sense of immersion of being “with” the protesters is, in itself, a storytelling statement that shows the filmmaker’s bias: you’re encouraged to
empathise with the disenfranchised Hong Kong voters, to feel like you’re not only with them in a virtual sense, but emotionally with them in support of their situation. I’m afraid that
watching the click-and-drag version of the video doesn’t do it justice: strap a Cardboard to your head to get the full experience.
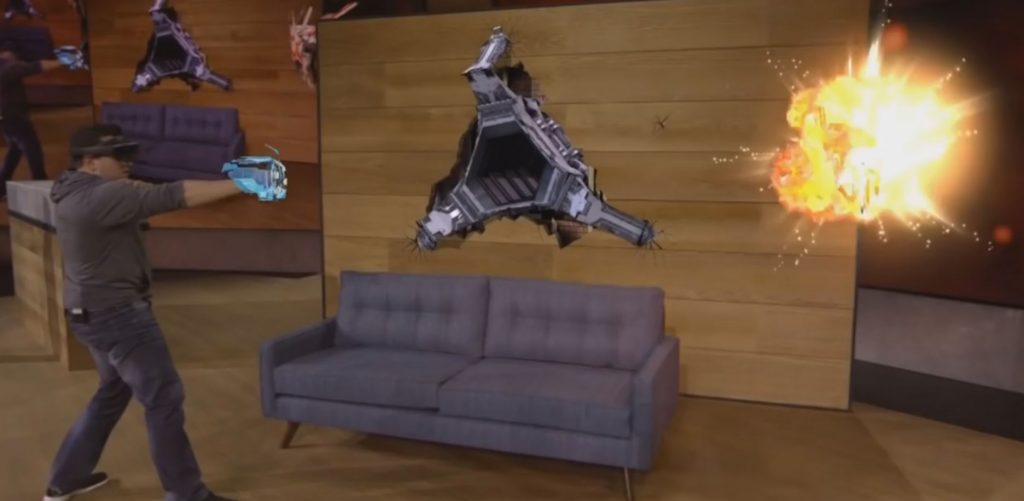
Don’t go thinking that I’m not paying attention to the development of the Hololens, too: I am, because it looks amazing. I just don’t know… what it’s for. And, I suspect, neither does
Microsoft.
But aside from the opportunities it presents, Virtual Reality brings huge new challenges for content creators, too. Consider that iconic spaghetti western The Good, The Bad, And The Ugly. The opening scene drops us right into one of the artistic themes of the film –
the balance of wide and close-up shots – when it initially shows us a wide open expanse but then quickly fills the frame with the face of Tuco (“The Ugly”), giving us the experience of
feeling suddenly cornered and trapped by this dangerous man. That’s a hugely valuable shot (and a director’s wet dream), but it represents something that we simply don’t have a way of
translating into an immersive VR setting! Aside from the obvious fact that the viewer could simply turn their head and ruin the surprise of the shot, it’s just not possible to fill the
frame with the actor’s face in this kind of way without forcing the focal depth to shift uncomfortably.
Sergio Leone’s masterpiece makes strategic use of alternating close and wide shots (and shots like the opening, which initially feels open but rapidly becomes claustrophobic).
That’s not to say that there exist stories that we can’t tell using virtual reality… just that we’re only just beginning to find out feet with this new medium. When stage directors took
their first steps into filmography in the early years of the 20th century, they originally tried to shoot films “as if” they were theatre (albeit, initially, silent theatre): static
cameras shooting an entire production from a single angle. Later, they discovered ways in which this new medium could provide new ways to tell stories: using title cards to set the
scene, close-ups to show actors’ faces more-clearly, panning shots, and so on.
Similarly: so long as we treat the current generation of VR as something different from the faltering steps we took two and a half decades ago, we’re in frontier territory and feeling
our way in VR, too. Do you remember when smartphone gaming first became a thing and nobody knew how to make proper user interfaces for it? Often your tiny mobile screen would simply try
to emulate classic controllers, with a “d-pad” and “buttons” in the corners of the screen, and it was awful… but nowadays, we better-understand the relationship that people have with
their phones and have adapted accordingly (perhaps the ultimate example of this, in my opinion, is the addictive One More Line, a minimalist game with a single-action “press anywhere” interface).
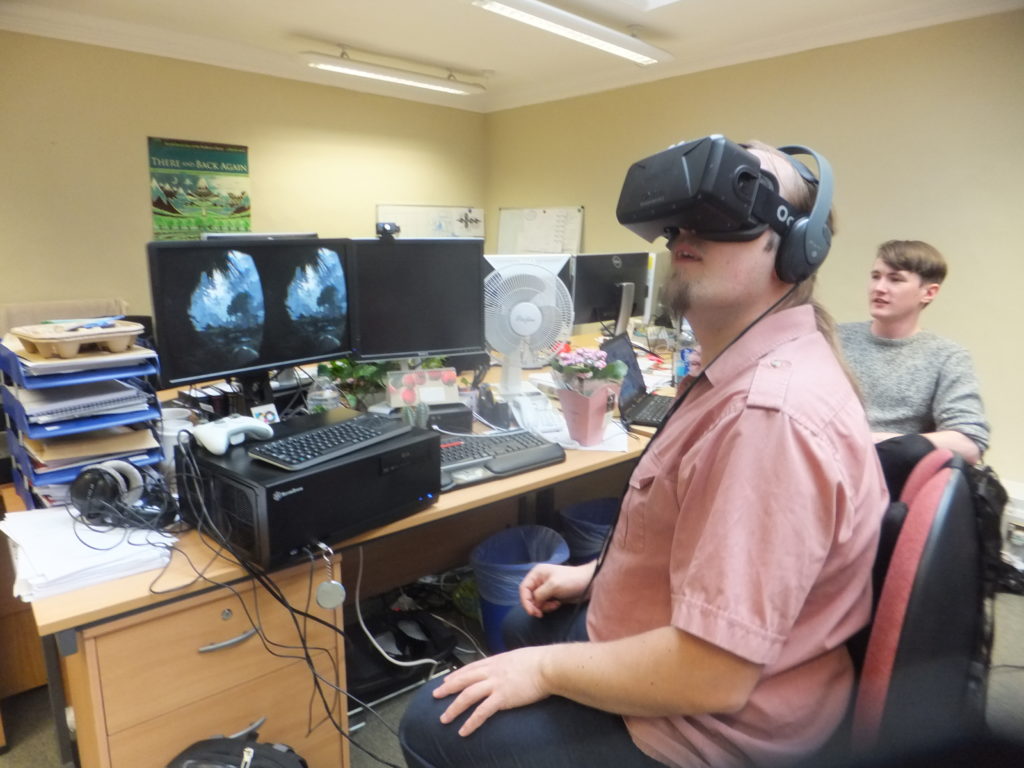
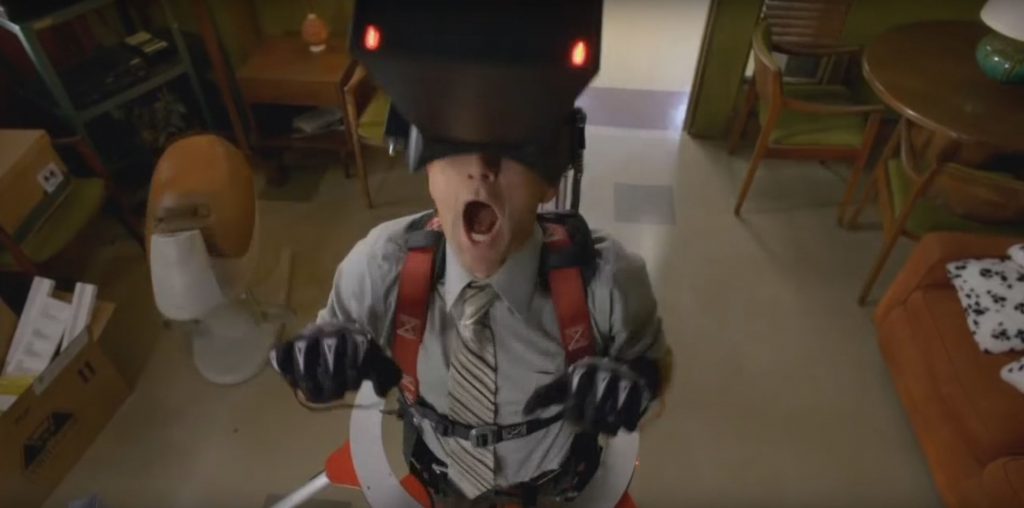
A few seconds after this photograph was taken, a T-rex came bounding out from the treeline and I literally jumped.
I borrowed an Oculus Rift DK2 from a co-worker’s partner (have I mentioned lately that I have the most awesome co-workers?) to get a little experience with it, and it’s honestly one of
the coolest bits of technology I’ve ever had the priviledge of playing with: the graphics, comfort, and responsiveness blows Cardboard out of the water. One of my first adventures –
Crytek’s tech demo Back to Dinosaur Island – was a visual spectacle even despite my apparently-underpowered
computer (I’d hooked the kit up to Gina, my two-month old 4K-capable media centre/gaming PC: I suspect that Cosmo, my multi-GPU watercooled beast might have fared
better). But I’ll have more to say about that – and the lessons I’ve learned – in the final part of this blog post.
Solved the puzzle yesterday but didn’t get the chance to come hint for this one until this morning, even I took a diversion from dropping my niece off at nursery to come and hunt!
Sapphirites wasn’t kidding: getting to the GZ by the obvious route (from the South) would be easier with wellies right now,
don’t know about coming from the North but I suspect it might be better. Fun cache, nice puzzle, good hiding spot. TFTC.
Found via a diversion from my cycle home this evening. Beaten to the FTF by Go Catch, of course, but that’s something I’m used
to, these days! TFTC: nice to see a new cache this far out of the Oxford ring road.
1st to solve… but I doubt that I can get there, first: probably won’t have time to visit until later this week, maybe even the weekend, unless I can rejigger my travel plans a little
bit. Love the puzzle, though!
I’ve loved many computers in my life, but the HTPC has always had a special place in my heart. It’s the only always-on workhorse computer in our house, it is utterly silent, totally
reliable, sips power, and it’s at the center of our home entertainment, networking, storage, and gaming. This handy box does it all,…
In 2007 I wrote about using PNGout to produce amazingly small PNG images. I still refer to this topic
frequently, as seven years later, the average PNG I encounter on the Internet is very unlikely to be optimized.
This is the first in a three-part blog post about telling stories using virtual reality. Read all of the parts
here.
As part of my work at the Bodleian… but to a greater extent “just for fun”… I’ve spent the last few weeks playing with virtual reality. But
first, a history lesson.
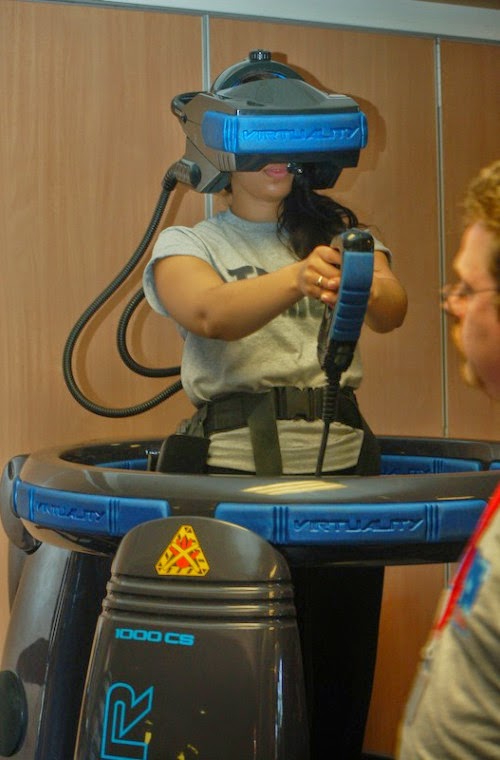
Virtual Reality’s biggest failing is that it’s sheer coolness is equally offset by what an idiot you look like when you’re using it.
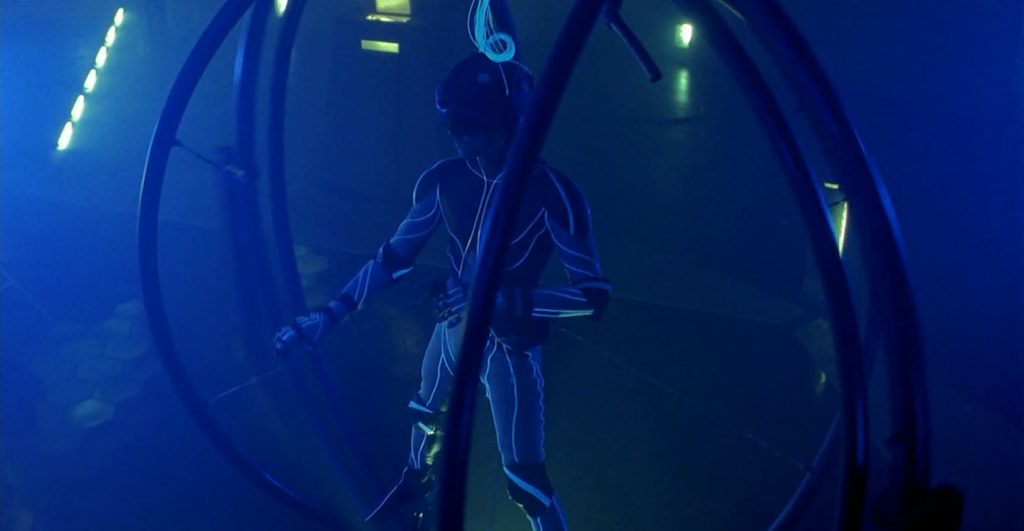
This isn’t the first time I’ve used virtual reality. The first time, for me, was in the early 1990s, at the Future Entertainment
Show, where I queued for a shot at Grid Busters on a Virtuality 1000-CS. The Virtuality 1000 was powered by an
“Expality”: functionally an Amiga 3000 with specially-written software for reading the (electromagnetically-sensed) facing of the
headset and the accompanying “space joystick”… and providing output via a pair of graphics cards (one for each eye) to LCD screens. The screens were embedded in chunky bits on the sides
of the helmet and projected towards mirrors and lenses at the far end – this apparently being an effort to reduce how “front-heavy” it felt, but I can tell you that in practice a
Virtuality headset felt weighty on your neck, even for its era!
Nonetheless, the experience stuck with me: I returned to school and became the envy of my friends (the nerdy ones, at least) when I told them about my VR adventure, and – not least
thanks to programs like Tomorrow’s World and, of course, the episode of Bad Influence that reminded
me quite how badly I wanted to get myself down to Nottingham for a go at Legend Quest – I was genuinely filled with optimism that within the decade, playing a VR game would
have gone from the fringes of science fiction to being something where everybody-knew-somebody who did it routinely.
A modern computer and VR headset combined probably weighs less than this reconditioned Virtuality 1000 headset.
I never managed to get to play Legend Quest, and that first “VR revolution” swiftly fell flat. My generation was promised all of the hi-tech science, immersion, and magical
experience of The Lawnmower Man, but all we were left with was the overblown promises, expensive effects, and ill-considered user experience of, well… The Lawnmower
Man. I discovered Virtuality machines in arcades once or twice, but they seemed to be out-of-order more often than not, and they quickly disappeared. You can’t really blame the
owners of arcades: if a machine costs you in the region of £40,000 to buy and you can charge, say, £1 for a 3-minute go on it (bear in mind that even the most-expensive digital arcade
machines tended to charge only around 30p, at this time, and most were 10p or 20p), and it needs supervision, and it can’t be maintained by your regular guy… well, that swiftly begins
to feel like a bad investment.
The Lawnmower Man has a lot to answer for.
Plus, the fifth generation of games consoles came along: the (original) Sony PlayStation, the
Nintendo N64, and – if you really wanted the highest-technology system (with the absolute least imaginative developers) – the Sega Saturn. These consoles came at price points that made
them suitable Christmas gifts for the good boys and girls of middle-class parents and sported 3D polygon graphics of the type that had previously only been seen in arcades, and the slow
decline of the video arcade accelerated dramatically. But home buyers couldn’t afford five-figure (still moderately-experimental) VR systems, and the market for VR dried up in a matter
of years. Nowadays, if you want to play on a Virtuality machine like the one I did, you need to find a collector (you might start with this guy from
Leicester, whose website was so useful in jogging my memory while I wrote this blog post).
And Jesus wept, for there were no more VR machines anywhere for, like, two decades.
2016 is the year in which this might change. The need for ubiquitous cheap computing has made RAM and even processors so economical that we throw them away when we’re done with
them. The demands of modern gaming computers and consoles has given us fast but affordable graphics rendering hardware. And the battle for the hottest new smartphones each year has
helped to produce light, bright, high-resolution screens no bigger than the palm of your hand.
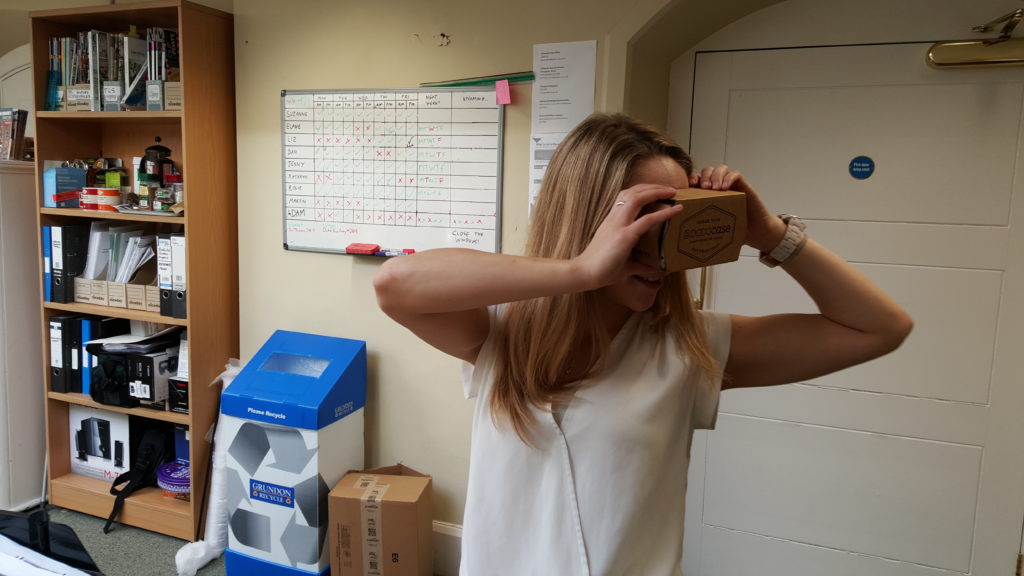
In fact, smartphones are now the simplest and cheapest way to play with VR. Under the assumption that you’ve already got a smartphone, you’re only a couple of cheap
plastic lenses and a bit of cardboard away from doing it for yourself. So that’s how my team and I started out playing: with the wonderfully-named Google Cardboard. I know that Google Cardboard is old-hat now and all the early adopters have even got their grandmothers using it now, but
it’s still a beautiful example of how economical VR threatens to become if this second “VR revolution” takes hold. Even if you didn’t already own a compatible
smartphone, you could buy a second-hand one on eBay for as little as £30: that’s an enormous difference from the £40K Virtuality machines of my youth, which had only a fraction of the
power.
An original-style Google Cardboard makes you look as much of a fool as any VR headset does. But more-specifically like a fool with a box on their head.
I’m going somewhere with this, I promise: but I wanted to have a jumping-off point from which to talk about virtual reality more-broadly first and it felt like I’d be overstretching if
I jumped right in at the middle. Y’know, like the second act of The Lawnmower Man. In the next part of this series, I’d like to talk about the storytelling opportunities that
modern VR offers us, and some of the challenges that come with it, and share my experience of playing with some “proper” modern hardware – an Oculus Rift.
Despite a full workload and a backlog of both work, personal, volunteering and study emails to deal with, 2016 is off to a pretty good start so far. Here’s some highlights:
In Sainsburys at the weekend, I got carded. Less than a week before my thirty-fifth birthday and for the first time in well over a decade, somebody asked me to prove my age when I
was trying to buy alcohol*. It’s even more-impressive when you consider that I was buying about £90 worth of shopping and a
single small bottle of kirsch… oh, and I had a toddler with me. That would have been an incredible amount of effort for somebody who very-definitely looks like he’s in his thirties.
Delighted.
This week, I’ve been mostly working on a project to make interactive digital content to support an exhibition on board games that we’re about to launch at my workplace. When my head
of department first mentioned the upcoming exhibition, there was no way you could have held me back fast enough.
Annabel has recently decided that she deserves a beard like her father and her Uncle Dan. Her new game is encouraging people to draw
them on her with washable pens. Aww.
This one’s the third design of beard she’s had this week – this one’s “like daddy”.
I hope everybody else’s year is kicking off just as well.
* With one possible exception: the other year, an overenthusiastic bouncer insisted that I join a queue of one in turn
to show him my ID before he let me into a nightclub at 9:30pm on a Wednesday night. Like I said, overenthusiastic.
As you’re no-doubt aware, Home Secretary Theresa May is probably going to get her way with her “snooper’s
charter” by capitalising on events in Paris (even though that makes no sense), and before long, people working for
law enforcement will be able to read your Internet usage history without so much as a warrant (or, to put it as the UN’s privacy chief put it, it’s “worse than scary”).
Or as John Oliver put it, “This bill could write into law a huge invasion of privacy.” Click to see a clip.
In a revelation that we should be thankful of as much as we’re terrified by, our government does not understand how the Internet works. And that’s why it’s really easy for
somebody with only a modicum of geekery to almost-completely hide their online activities from observation by their government and simultaneously from hackers. Here’s a device that I
built the other weekend, and below I’ll tell you how to do it yourself (and how it keeps you safe online from a variety of threats, as well as potentially giving you certain other
advantages online):
It’s small, it’s cute, and it goes a long way to protecting my privacy online.
I call it “Iceland”, for reasons that will become clear later. But a more-descriptive name would be a “Raspberry Pi VPN Hotspot”. Here’s what you’ll need if you want to build one:
A Raspberry Pi Model B (or later) – you can get these from less than £30 online and it’ll come with an SD card that’ll let it boot Raspbian, which is the Linux
distribution I’ve used in my example: there’s no reason you couldn’t use another one if you’re familiar with it
A USB WiFi dongle that supports “access point” mode – I’m using an Edimax one that cost me under a fiver – but it took a little hacking to make it work – I’ve heard
that Panda and RALink dongles are easier
A subscription to a VPN with OpenVPN support and at least one endpoint outside of the UK – I’m using VyprVPN because
I have a special offer, but there are lots of cheaper options: here’s a great article about
choosing one
A basic familiarity with a *nix command line, an elementary understanding of IP networking, and a spare 20 minutes.
From here on, this post gets pretty geeky. Unless you plan on building your own little box to encrypt all of your home’s WiFi traffic until it’s well out of the UK and
close-to-impossible to link to you personally (which you should!), then you probably ought to come back to it another time.
Here’s how it’s done:
1. Plug in, boot, and install some prerequisites
Plug the WiFi dongle into a USB port and connect the Ethernet port to your Internet router. Boot your Raspberry Pi into Raspbian (as described in the helpsheet that comes with
it), and run:
If, like me, you’re using an Edimax dongle, you need to do an extra couple of steps to make it work as an access point. Skip this bit if you’re using one of the other dongles I listed
or if you know better.
Get OpenVPN configuration files from your VPN provider: often these will be available under the iOS downloads. There’ll probably be one for each available endpoint. I chose the one for
Reyjkavik, because Iceland’s got moderately sensible privacy laws and I’m pretty confident that it would take judicial oversight for British law enforcement to collaborate with
Icelandic authorities on getting a wiretap in place, which is the kind of level of privacy I’m happy with. Copy your file to /etc/openvpn/openvpn.conf and edit it: you may find that you
need to put your VPN username and password into it to make it work.
sudo service openvpn start
You can now test your VPN’s working, if you like. I suggest connecting to the awesome icanhazip.com and asking it where you are (you can use your
favourite GeoIP website to tell you what country it thinks you’re in, based on that):
curl -4 icanhazip.com
Another option would be to check with a GeoIP service directly:
curl freegeoip.net/json/
4. Set up your firewall and restart the VPN connection
Unless your VPN provider gives you DNAT (and even if they do, if you’re paranoid), you should set up a firewall to allow only outgoing connections to be established, and then restart
your VPN connection:
sudo iptables -A INPUT -i tun0 -m conntrack --ctstate RELATED,ESTABLISHED -j ACCEPT
sudo iptables -A INPUT -i tun0 -j DROP
sudo sh -c "iptables-save > /etc/iptables.nat.vpn.secure"
sudo sh -c "echo 'up iptables-restore < /etc/iptables.nat.vpn.secure' >> /etc/network/interfaces"
sudo service openvpn restart
5. Configure your WiFi hotspot
Configure bind as your DNS server, caching responses on behalf of Google’s DNS servers, or another DNS server that you trust. Alternatively, you can just configure your DHCP clients to
use Google’s DNS servers directly, but caching will probably improve your performance overall. To do this, add a forwarder to /etc/bind/named.conf.options:
forwarders {
  8.8.8.8;
  8.8.4.4;
};
Restart bind, and make sure it loads on boot:
sudo service bind9 restart
sudo update-rc.d bind9 enable
Edit /etc/udhcpd.conf. As a minimum, you should have a configuration along these lines (you might need to tweak your IP address assignments to fit with your local network – the “router”
and “dns” settings should be set to the IP address you’ll give to your Raspberry Pi):
start 192.168.0.2
end 192.168.0.254
interface wlan0
remaining yes
opt dns 192.168.0.1
option subnet 255.255.255.0
opt router 192.168.0.1
option lease 864000 # 10 days
Enable DHCP by uncommenting (remove the hash!) the following line in /etc/default/udhcpd:
#DHCPD_ENABLED="yes"
Set a static IP address on your Raspberry Pi in the same subnet as you configured above (but not between the start and end of the DHCP list):
sudo ifconfig wlan0 192.168.0.1
And edit your /etc/network/interfaces file to configure it to retain this on reboot (you’ll need to use tabs, not spaces, for indentation):
Right – onto hostapd, the fiddliest of the tools you’ll have to configure. Create or edit /etc/hostapd/hostapd.conf as follows, but substitute in your own SSID, hotspot password, and
channel (to minimise interference, which can slow your network down, I recommend using WiFi scanner tool on your mobile to find which channels your neighbours aren’t using, and
use one of those – you should probably avoid the channel your normal WiFi uses, too, so you don’t slow your own connection down with crosstalk):
Hook up this configuration by editing /etc/default/hostapd:
DAEMON_CONF="/etc/hostapd/hostapd.conf"
Fire up the hotspot, and make sure it runs on reboot:
sudo service hostapd start
sudo service udhcpd start
sudo update-rc.d hostapd enable
sudo update-rc.d udhcpd enable
Finally, set up NAT so that people connecting to your new hotspot are fowarded through the IP tunnel of your VPN connection:
sudo sh -c "echo 1 > /proc/sys/net/ipv4/ip_forward"
sudo sh -c "echo net.ipv4.ip_forward=1 >> /etc/sysctl.conf"
sudo iptables -t nat -A POSTROUTING -o tun0 -j MASQUERADE
sudo sh -c "iptables-save > /etc/iptables.nat.vpn.secure"
6. Give it a go!
Connect to your new WiFi hotspot, and go to your favourite GeoIP service. Or, if your VPN endpoint gives you access to geographically-limited services, give those a go (you’d be amazed
how different the Netflix catalogues are in different parts of the world). And give me a shout if you need any help or if you have any clever ideas about how this magic little box can
be improved.
Greetings from Oxford, England! We stayed in a nearby houseboat while in Leiden for a wedding. I enjoyed the chance for a walk through these lovely grounds. TFTC!
I’ve been a huge fan of the “hacker game” ever since I first played 1985’s Hacker on my Amstrad CPC: I’m pretty hardened to the genre, and I can confidently say that not since Uplink
has anything broken through my firewall like Hacknet did. If you’re looking for an easy-to-pick up and compelling puzzle game in a cyberpunk theme, it’s a clear winner: I got 6 hours of
thoroughly enjoyable playtime out of it, and I’m sure I’ll go back and get the same again when I find the chance to go and explore deeper.
There’s a wonderful tool for making web-based “choose your own adventure”-type games, called Twine. One of the best things about it is that it’s so
accessible: if you wanted to, you could be underway writing your first ever story with it in about 5 minutes from now, without installing anything at all, and when it was done you could
publish it on the web and it would just work.
A “story map” in Twine 2. Easy interactive fiction writing for normal people.
But the problem with Twine is that, in its latest and best versions, you’re trapped into using the Twine IDE. The Twine IDE
is an easy-to-use, highly visual, ‘drag-and-drop’ interface for making interactive stories. Which is probably great if you’re into IDEs or if you don’t “know better”… but for those of us who prefer to do our writing in a nice clean, empty text editor like Sublime or TextMate or to script/automate our builds, it’s just frustrating to lose access to the tools we love.
Plus, highly-visual IDEs make it notoriously hard to collaborate with other authors on the same work without simply passing
it back and forwards between you: unless they’ve been built with this goal in mind, you generally can’t have two people working in the same file at the same time.
Now THIS is what code editing should look like.
Earlier versions of Twine had a command-line tool called Twee that perfectly filled this gap. But the shiny new versions don’t. That’s where I came in.
In that way that people who know me are probably used to by now, I was very-slightly unsatisfied with one aspect of an otherwise fantastic product and decided that the
correct course of action was to reimplement it myself. So that’s how, a few weeks ago, I came to release Twee2.
Twee2’s logo integrates the ‘branching’ design of Twine adventures with the ‘double-colon’ syntax of Twee.
If you’re interested in writing your own “Choose Your Own Adventure”-type interactive fiction, whether for the world or
just for friends, but you find user-friendly IDEs like Twine limiting (or you just prefer a good old-fashioned text editor), then give Twee2 a go. I’ve written a simple 2-minute tutorial to get you
started, it works on Windows, MacOS, Linux, and just-about everything else, and it’s completely open-source if you’d like to expand or
change it yourself.
(there are further discussions about the concept and my tool on Reddit here, here, here and here, and on the Twinery forums here, here and here)