Enigma, the Bombe, and Typex

This article is a repost promoting content originally published elsewhere. See more things Dan's reposted.

How to guides

How to encrypt/decrypt with Enigma

We’ll start with a step-by-step guide to decrypting a known message. You can see the result of these steps in CyberChef here. Let’s say that our message is as follows:

XTSYN WAEUG EZALY NRQIM AMLZX MFUOD AWXLY LZCUZ QOQBQ JLCPK NDDRW F

And that we’ve been told that a German service Enigma is in use with the following settings:

Rotors III, II, and IV, reflector B, ring settings (Ringstellung in German) KNG, plugboard (Steckerbrett)AH CO DE GZ IJ KM LQ NY PS TW, and finally the rotors are set to OPM.

Enigma settings are generally given left-to-right. Therefore, you should ensure the 3-rotor Enigma is selected in the first dropdown menu, and then use the dropdown menus to put rotor III in the 1st rotor slot, II in the 2nd, and IV in the 3rd, and pick B in the reflector slot. In the ring setting and initial value boxes for the 1st rotor, put K and O respectively, N and P in the 2nd, and G and M in the 3rd. Copy the plugboard settings AH CO DE GZ IJ KM LQ NY PS TW into the plugboard box. Finally, paste the message into the input window.

The output window will now read as follows:

HELLO CYBER CHEFU SERST HISIS ATEST MESSA GEFOR THEDO CUMEN TATIO N

The Enigma machine doesn’t support any special characters, so there’s no support for spaces, and by default unsupported characters are removed and output is put into the traditional five-character groups. (You can turn this off by disabling “strict input”.) In some messages you may see X used to represent space.

Encrypting with Enigma is exactly the same as decrypting – if you copy the decrypted message back into the input box with the same recipe, you’ll get the original ciphertext back.

Plugboard, rotor and reflector specifications

The plugboard exchanges pairs of letters, and is specified as a space-separated list of those pairs. For example, with the plugboard AB CD, A will be exchanged for B and vice versa, C for D, and so forth. Letters that aren’t specified are not exchanged, but you can also specify, for example, AA to note that A is not exchanged. A letter cannot be exchanged more than once. In standard late-war German military operating practice, ten pairs were used.

You can enter your own components, rather than using the standard ones. A rotor is an arbitrary mapping between letters – the rotor specification used here is the letters the rotor maps A through Z to, so for example with the rotor ESOVPZJAYQUIRHXLNFTGKDCMWB, A maps to E, B to S, and so forth. Each letter must appear exactly once. Additionally, rotors have a defined step point (the point or points in the rotor’s rotation at which the neighbouring rotor is stepped) – these are specified using a < followed by the letters at which the step happens.

Reflectors, like the plugboard, exchange pairs of letters, so they are entered the same way. However, letters cannot map to themselves.

How to encrypt/decrypt with Typex

The Typex machine is very similar to Enigma. There are a few important differences from a user perspective:

  • Five rotors are used.
  • Rotor wirings cores can be inserted into the rotors backwards.
  • The input plugboard (on models which had one) is more complicated, allowing arbitrary letter mappings, which means it functions like, and is entered like, a rotor.
  • There was an additional plugboard which allowed rewiring of the reflector: this is supported by simply editing the specified reflector.

Like Enigma, Typex only supports enciphering/deciphering the letters A-Z. However, the keyboard was marked up with a standardised way of representing numbers and symbols using only the letters. You can enable emulation of these keyboard modes in the operation configuration. Note that this needs to know whether the message is being encrypted or decrypted.

How to attack Enigma using the Bombe

Let’s take the message from the first example, and try and decrypt it without knowing the settings in advance. Here’s the message again:

XTSYN WAEUG EZALY NRQIM AMLZX MFUOD AWXLY LZCUZ QOQBQ JLCPK NDDRW F

Let’s assume to start with that we know the rotors used were III, II, and IV, and reflector B, but that we know no other settings. Put the ciphertext in the input window and the Bombe operation in your recipe, and choose the correct rotors and reflector. We need one additional piece of information to attack the message: a “crib”. This is a section of known plaintext for the message. If we know something about what the message is likely to contain, we can guess possible cribs.

We can also eliminate some cribs by using the property that Enigma cannot encipher a letter as itself. For example, let’s say our first guess for a crib is that the message begins with “Hello world”. If we enter HELLO WORLD into the crib box, it will inform us that the crib is invalid, as the W in HELLO WORLD corresponds to a W in the ciphertext. (Note that spaces in the input and crib are ignored – they’re included here for readability.) You can see this in CyberChef here

Let’s try “Hello CyberChef” as a crib instead. If we enter HELLO CYBER CHEF, the operation will run and we’ll be presented with some information about the run, followed by a list of stops. You can see this here. Here you’ll notice that it says Bombe run on menu with 0 loops (2+ desirable)., and there are a large number of stops listed. The menu is built from the crib you’ve entered, and is a web linking ciphertext and plaintext letters. (If you’re maths inclined, this is a graph where letters – plain or ciphertext – are nodes and states of the Enigma machine are edges.) The machine performs better on menus which have loops in them – a letter maps to another to another and eventually returns to the first – and additionally on longer menus. However, menus that are too long risk failing because the Bombe doesn’t simulate the middle rotor stepping, and the longer the menu the more likely this is to have happened. Getting a good menu is a mixture of art and luck, and you may have to try a number of possible cribs before you get one that will produce useful results.

Bombe menu diagram

In this case, if we extend our crib by a single character to HELLO CYBER CHEFU, we get a loop in the menu (that U maps to a Y in the ciphertext, the Y in the second cipher block maps to A, the A in the third ciphertext block maps to E, and the E in the second crib block maps back to U). We immediately get a manageable number of results. You can see this here. Each result gives a set of rotor initial values and a set of identified plugboard wirings. Extending the crib further to HELLO CYBER CHEFU SER produces a single result, and it has also recovered eight of the ten plugboard wires and identified four of the six letters which are not wired. You can see this here.

We now have two things left to do:

  1. Recover the remaining plugboard settings.
  2. Recover the ring settings.

This will need to be done manually.

Set up an Enigma operation with these settings. Leave the ring positions set to A for the moment, so from top to bottom we have rotor III at initial value E, rotor II at C, and rotor IV at G, reflector B, and plugboard DE AH BB CO FF GZ LQ NY PS RR TW UU.

You can see this here. You will immediately notice that the output is not the same as the decryption preview from the Bombe operation! Only the first three characters – HEL – decrypt correctly. This is because the middle rotor stepping was ignored by the Bombe. You can correct this by adjusting the ring position and initial value on the right-hand rotor in sync. They are currently A and G respectively. Advance both by one to B and H, and you’ll find that now only the first two characters decrypt correctly.

Keep trying settings until most of the message is legible. You won’t be able to get the whole message correct, but for example at F and L, which you can see here, our message now looks like:

HELLO CYBER CHEFU SERTC HVSJS QTEST KESSA GEFOR THEDO VUKEB TKMZM T

At this point we can recover the remaining plugboard settings. The only letters which are not known in the plugboard are J K V X M I, of which two will be unconnected and two pairs connected. By inspecting the ciphertext and partially decrypted plaintext and trying pairs, we find that connecting IJ and KM results, as you can see here, in:

HELLO CYBER CHEFU SERST HISIS ATEST MESSA GEFOR THEDO CUMEO TMKZK T

This is looking pretty good. We can now fine tune our ring settings. Adjusting the right-hand rotor to G and M gives, as you can see here,

HELLO CYBER CHEFU SERST HISIS ATEST MESSA GEFOR THEDO CUMEN WMKZK T

which is the best we can get with only adjustments to the first rotor. You now need to adjust the second rotor. Here, you’ll find that anything from D and F to Z and B gives the correct decryption, for example here. It’s not possible to determine the exact original settings from only this message. In practice, for the real Enigma and real Bombe, this step was achieved via methods that exploited the Enigma network operating procedures, but this is beyond the scope of this document.

What if I don’t know the rotors?

You’ll need the “Multiple Bombe” operation for this. You can define a set of rotors to choose from – the standard WW2 German military Enigma configurations are provided or you can define your own – and it’ll run the Bombe against every possible combination. This will take up to a few hours for an attack against every possible configuration of the four-rotor Naval Enigma! You should run a single Bombe first to make sure your menu is good before attempting a multi-Bombe run.

You can see an example of using the Multiple Bombe operation to attack the above example message without knowing the rotor order in advance here.

What if I get far too many stops?

Use a longer or different crib. Try to find one that produces loops in the menu.

What if I get no stops, or only incorrect stops?

Are you sure your crib is correct? Try alternative cribs.

What if I know my crib is right, but I still don’t get any stops?

The middle rotor has probably stepped during the encipherment of your crib. Try a shorter or different crib.

How things work

How Enigma works

We won’t go into the full history of Enigma and all its variants here, but as a brief overview of how the machine works:

Enigma uses a series of letter->letter conversions to produce ciphertext from plaintext. It is symmetric, such that the same series of operations on the ciphertext recovers the original plaintext.

The bulk of the conversions are implemented in “rotors”, which are just an arbitrary mapping from the letters A-Z to the same letters in a different order. Additionally, to enforce the symmetry, a reflector is used, which is a symmetric paired mapping of letters (that is, if a given reflector maps X to Y, the converse is also true). These are combined such that a letter is mapped through three different rotors, the reflector, and then back through the same three rotors in reverse.

To avoid Enigma being a simple Caesar cipher, the rotors rotate (or “step”) between enciphering letters, changing the effective mappings. The right rotor steps on every letter, and additionally defines a letter (or later, letters) at which the adjacent (middle) rotor will be stepped. Likewise, the middle rotor defines a point at which the left rotor steps. (A mechanical issue known as the double-stepping anomaly means that the middle rotor actually steps twice when the left hand rotor steps.)

The German military Enigma adds a plugboard, which is a configurable pair mapping of letters (similar to the reflector, but not requiring that every letter is exchanged) applied before the first rotor (and thus also after passing through all the rotors and the reflector).

It also adds a ring setting, which allows the stepping point to be adjusted.

Later in the war, the Naval Enigma added a fourth rotor. This rotor does not step during operation. (The fourth rotor is thinner than the others, and fits alongside a thin reflector, meaning this rotor is not interchangeable with the others on a real Enigma.)

There were a number of other variants and additions to Enigma which are not currently supported here, as well as different Enigma networks using the same basic hardware but different rotors (which are supported by supplying your own rotor configurations).

How Typex works

Typex is a clone of Enigma, with a few changes implemented to improve security. It uses five rotors rather than three, and the rightmost two are static. Each rotor has more stepping points. Additionally, the rotor design is slightly different: the wiring for each rotor is in a removable core, which sits in a rotor housing that has the ring setting and stepping notches. This means each rotor has the same stepping points, and the rotor cores can be inserted backwards, effectively doubling the number of rotor choices.

Later models (from the Mark 22, which is the variant we simulate here) added two plugboards: an input plugboard, which allowed arbitrary letter mappings (rather than just pair switches) and thus functioned similarly to a configurable extra static rotor, and a reflector plugboard, which allowed rewiring the reflector.

How the Bombe works

The Bombe is a mechanism for efficiently testing and discarding possible rotor positions, given some ciphertext and known plaintext. It exploits the symmetry of Enigma and the reciprocal (pairwise) nature of the plugboard to do this regardless of the plugboard settings. Effectively, the machine makes a series of guesses about the rotor positions and plugboard settings and for each guess it checks to see if there are any contradictions (e.g. if it finds that, with its guessed settings, the letter A would need to be connected to both B and C on the plugboard, that’s impossible, and these settings cannot be right). This is implemented via careful connection of electrical wires through a group of simulated Enigma machines.

A full explanation of the Bombe’s operation is beyond the scope of this document – you can read the source code, and the authors also recommend Graham Ellsbury’s Bombe explanation, which is very clearly diagrammed.

Implementation in CyberChef

Enigma/Typex

Enigma and Typex were implemented from documentation of their functionality.

Enigma rotor and reflector settings are from GCHQ’s documentation of known Enigma wirings. We currently simulate all basic versions of the German Service Enigma; most other versions should be possible by manually entering the rotor wirings. There are a few models of Enigma, or attachments for the Service Enigma, which we don’t currently simulate. The operation was tested against some of GCHQ’s working examples of Enigma machines. Output should be letter-for-letter identical to a real German Service Enigma. Note that some Enigma models used numbered rather than lettered rotors – we’ve chosen to stick with the easier-to-use lettered rotors.

There were a number of different Typex versions over the years. We implement the Mark 22, which is backwards compatible with some (but not completely with all, as some early variants supported case sensitivity) older Typex models. GCHQ also has a partially working Mark 22 Typex. This was used to test the plugboards and mechanics of the machine. Typex rotor settings were changed regularly, and none have ever been published, so a test against real rotors was not possible. An example set of rotors have been randomly generated for use in the Typex operation. Some additional information on the internal functionality was provided by the Bombe Rebuild Project.

The Bombe

The Bombe was likewise implemented on the basis of documentation of the attack and the machine. The Bombe Rebuild Project at the National Museum of Computing answered a number of technical questions about the machine and its operating procedures, and helped test our results against their working hardware Bombe, for which the authors would like to extend our thanks.

Constructing menus from cribs in a manner that most efficiently used the Bombe hardware was another difficult step of operating the real Bombes. We have chosen to generate the menu automatically from the provided crib, ignore some hardware constraints of the real Bombe (e.g. making best use of the number of available Enigmas in the Bombe hardware; we simply simulate as many as are necessary), and accept that occasionally the menu selected automatically may not always be the optimal choice. This should be rare, and we felt that manual menu creation would be hard to build an interface for, and would add extra barriers to users experimenting with the Bombe.

The output of the real Bombe is optimised for manual verification using the checking machine, and additionally has some quirks (the rotor wirings are rotated by, depending on the rotor, between one and three steps compared to the Enigma rotors). Therefore, the output given is the ring position, and a correction depending on the rotor needs to be applied to the initial value, setting it to W for rotor V, X for rotor IV, and Y for all other rotors. We felt that this would require too much explanation in CyberChef, so the output of CyberChef’s Bombe operation is the initial value for each rotor, with the ring positions set to A, required to decrypt the ciphertext starting at the beginning of the crib. The actual stops are the same. This would not have caused problems at Bletchley Park, as operators working with the Bombe would never have dealt with a real or simulated Enigma, and vice versa.

By default the checking machine is run automatically and stops which fail silently discarded. This can be disabled in the operation configuration, which will cause it to output all stops from the actual Bombe hardware instead. (In this case you only get one stecker pair, rather than the set identified by the checking machine.)

Optimisation

A three-rotor Bombe run (which tests 17,576 rotor positions and takes about 15-20 minutes on original Turing Bombe hardware) completes in about a fifth of a second in our tests. A four-rotor Bombe run takes about 5 seconds to try all 456,976 states. This also took about 20 minutes on the four-rotor US Navy Bombe (which rotates about 30 times faster than the Turing Bombe!). CyberChef operations run single-threaded in browser JavaScript.

We have tried to remain fairly faithful to the implementation of the real Bombe, rather than a from-scratch implementation of the underlying attack. There is one small deviation from “correct” behaviour: the real Bombe spins the slow rotor on a real Enigma fastest. We instead spin the fast rotor on an Enigma fastest. This means that all the other rotors in the entire Bombe are in the same state for the 26 steps of the fast rotor and then step forward: this means we can compute the 13 possible routes through the lower two/three rotors and reflector (symmetry means there are only 13 routes) once every 26 ticks and then save them. This does not affect where the machine stops, but it does affect the order in which those stops are generated.

The fast rotors repeat each others’ states: in the 26 steps of the fast rotor between steps of the middle rotor, each of the scramblers in the complete Bombe will occupy each state once. This means we can once again store each state when we hit them and reuse them when the other scramblers rotate through the same states.

Note also that it is not necessary to complete the energisation of all wires: as soon as 26 wires in the test register are lit, the state is invalid and processing can be aborted.

The above simplifications reduce the runtime of the simulation by an order of magnitude.

If you have a large attack to run on a multiprocessor system – for example, the complete M4 Naval Enigma, which features 1344 possible choices of rotor and reflector configuration, each of which takes about 5 seconds – you can open multiple CyberChef tabs and have each run a subset of the work. For example, on a system with four or more processors, open four tabs with identical Multiple Bombe recipes, and set each tab to a different combination of 4th rotor and reflector (as there are two options for each). Leave the full set of eight primary rotors in each tab. This should complete the entire run in about half an hour on a sufficiently powerful system.

To celebrate their centenary, GCHQ have open-sourced very-faithful reimplementations of Enigma, Typex, and Bombe that you can run in your browser. That’s pretty cool, and a really interesting experimental toy for budding cryptographers and cryptanalysts!

The “Backendification” of Frontend Development

This article is a repost promoting content originally published elsewhere. See more things Dan's reposted.

https://hackernoon.com/the-backendification-of-frontend-development-62f218a773d4 (hackernoon.com)

Asynchronous JavaScript in the form of Single Page Applications (SPA) offer an incredible opportunity for improving the user experience of your web applications. CSS frameworks like Bootstrap enable developers to quickly contribute styling as they’re working on the structure and behaviour of things.

Unfortunately, SPA and CSS frameworks tend to result in relatively complex solutions where traditionally separated concerns – HTML-structure, CSS-style, and JS-behaviour – are blended together as a matter of course — Counter to the lessons learned by previous generations.

This blending of concerns can prevent entry level developers and valued specialists (Eg. visual design, accessibility, search engine optimization, and internationalization) from making meaningful contributions to a project.

In addition to the increasing cost of the few developers somewhat capable of juggling all of these concerns, it can also result in other real world business implications.

What is a front-end developer? Does anybody know, any more? And more-importantly, how did we get to the point where we’re actively encouraging young developers into habits like writing (cough React cough) files containing a bloaty, icky mixture of content, HTML (markup), CSS (style), and Javascript (behaviour)? Yes, I get that the idea is that individual components should be packaged together (if you’re thinking in a React-like worldview), but that alone doesn’t justify this kind of bullshit antipattern.

It seems like the Web used to have developers. Then it got complex so we started differentiating back-end from front-end developers and described those who, like me, spanned the divide, as full-stack developers We gradually became a minority as more and more new developers, deprived of the opportunity to learn each new facet organically in this newly-complicated landscape, but that’s fine. But then… we started treating the front-end as the only end, and introducing all kinds of problems as a result… and most people don’t seem to have noticed, yet, exactly how much damage we’re doing to Web applications’ security, maintainability, future-proofibility, archivability, addressibility…

Modern CSS on DanQ.me

The current iteration of my blog diverges from an architectural principle common to most of previous versions of the last 20 years. While each previous change in design and layout was intended to provide a single monolithic upgrade, this version tries to provide me with a platform for continuous ongoing experimentation and change.

Debug console on DanQ.me showing Dan's head and a speech bubble.
Earlier this year I added experimental console art, for example. Click through for more details.

I’ve been trying to make better use of my blog as a vehicle for experimenting with web technologies, as I used to with personal sites back in the 1990s and early 2000s; to see a vanity site like this one as a living playground rather than something that – like most of the sites I’m paid to work on – something whose design is, for the most part, static for long periods of time.

"Blog" dropdown menu on DanQ.me.
The “popular” flag and associated background colour in the “Blog” top-level menu became permanent after a period of A/B testing. Thanks, unwitting testers!

Among the things I’ve added prior to the initial launch of this version of the design are gracefully-degrading grids, reduced-motion support, and dark-mode support – three CSS features of increasing levels of “cutting edge”-ness but each of which is capable of being implemented in a way that does not break the site’s compatibility. This site’s pages are readable using (simulations of) ancient rendering engines or even in completely text-based browsers, and that’s just great.

Here’s how I’ve implemented those three features:

Gracefully-degrading grids

Grid of recent notes and shares on DanQ.me
I’m not entirely happy with the design of these boxes, but that’s a job for another day.

The grid of recent notes, shares, checkins and videos on my homepage is powered by the display: grid; CSS directive. The number of columns varies by screen width from six on the widest screens down to three or just one on increasingly small screens. Crucially, grid-auto-flow: dense; is used to ensure an even left-to-right filling of the available space even if one of the “larger” blocks (with grid-column: span 2; grid-row: span 2;) is forced for space reasons to run onto the next line. This means that content might occasionally be displayed in a different order from that in which it is written in the HTML (which is reverse order of publication), but in exchange the items are flush with both sides.

Grid sample showing impact of dense flow.
The large “5 Feb” item in this illustration should, reverse-chronologically, appear before the “3 Feb” item, but there isn’t room for it on the previous line. grid-auto-flow: dense; means that the “3 Feb” item is allowed to bubble-up and fill the gap, appearing out-of-order but flush with the edge.

Not all web browsers support display: grid; and while that’s often only one of design and not of readability because these browsers will fall back to usually-very-safe default display modes like block and inline, as appropriate, sometimes there are bigger problems. In Internet Explorer 11, for example, I found (with thanks to @_ignatg) a problem with my directives specifying the size of these cells (which are actually <li> elements because, well, semantics matter). Because it understood the directives that ought to impact the sizing of the list items but not the one that redeclared its display type, IE made… a bit of a mess of things…

Internet Explorer scrambles a list/grid combination.
Thanks, Internet Explorer. That’s totally what I was looking for.

Do websites need to look the same in every browser? No. But the content should be readable regardless, and here my CSS was rendering my content unreadable. Given that Internet Explorer users represent a little under 0.1% of visitors to my site I don’t feel the need to hack it to have the same look-and-feel: I just need it to have the same content readability. CSS Feature Queries to the rescue!

CSS Feature Queries – the @supports selector – make it possible to apply parts of your stylesheet if and only if the browser supports specific CSS features, for example grids. Better yet, using it in a positive manner (i.e. “apply these rules only if the browser supports this feature”) is progressive enhancement, because browsers that don’t understand the  @supports selector act in the same way as those that understand it but don’t support the specified feature. Fencing off the relevant parts of my stylesheet in a @supports (display: grid) { ... } block instructed IE to fall back to displaying that content as a boring old list: exactly what I needed.

Internet Explorer's view of the "grid" on the DanQ.me homepage.
It isn’t pretty, but it’s pretty usable!

Reduced-motion support

I like to put a few “fun” features into each design for my blog, and while it’s nowhere near as quirky as having my head play peek-a-boo when you hover your cursor over it, the current header’s animations are in the same ballpark: hover over or click on some of the items in the header menu to see for yourself..

Main menu with "Dan Q" title in it's "bounced" position.
I’m most-pleased with the playful “bounce” of the letter Q when you hover over my name.

These kinds of animations are fun, but they can also be problematic. People with inner ear disorders (as well as people who’re just trying to maximise the battery life on their portable devices!) might prefer not to see them, and web designers ought to respect that choice where possible. Luckily, there’s an emerging standard to acknowledge that: prefers-reduced-motion. Alongside its cousins inverted-colors, prefers-reduced-transparency, prefers-contrast and prefers-color-scheme (see below for that last one!), these new CSS tools allow developers to optimise based on the accessibility features activated by the user within their operating system.

Motion-reducing controls in Windows 10 and MacOS X.
In Windows you turn off animations while in MacOS you turn on not-having animations, but the principle’s the same.

If you’ve tweaked your accessibility settings to reduce the amount of animation your operating system shows you, this website will respect that choice as well by not animating the contents of the title, menu, or the homepage “tiles” any more than is absolutely necessary… so long as you’re using a supported browser, which right now means Safari or Firefox (or the “next” version of Chrome). Making the change itself is pretty simple: I just added a @media screen and (prefers-reduced-motion: reduce) { ... } block to disable or otherwise cut-down on the relevant animations.

Dark-mode support

DanQ.me in dark mode.

Similarly, operating systems are beginning to support “dark mode”, designed for people trying to avoid eyestrain when using their computer at night. It’s possible for your browser to respect this and try to “fix” web pages for you, of course, but it’s better still if the developer of those pages has anticipated your need and designed them to acknowledge your choice for you. It’s only supported in Firefox and Safari so far and only on recent versions of Windows and MacOS, but it’s a start and a helpful touch for those nocturnal websurfers out there.

Enabling Dark Mode on Windows 10 and MacOS X
Come to the dark side, Luke. Or just get f.lux, I suppose.

It’s pretty simple to implement. In my case, I just stacked some overrides into a @media (prefers-color-scheme: dark) { ... } block, inverting the background and primary foreground colours, softening the contrast, removing a few “bright” borders, and darkening rather than lightening background images used on homepage tiles. And again, it’s an example of progressive enhancement: the (majority!) of users whose operating systems and/or browsers don’t yet support this feature won’t be impacted by its inclusion in my stylesheet, but those who can make use of it can appreciate its benefits.

This isn’t the end of the story of CSS experimentation on my blog, but it’s a part of the it that I hope you’ve enjoyed.

× × × × × × ×

Debugging WorldWideWeb

Earlier this week, I mentioned the exciting hackathon that produced a moderately-faithful reimagining of the world’s first Web browser. I was sufficiently excited about it that I not only blogged here but I also posted about it to MetaFilter. Of course, the very first thing that everybody there did was try to load MetaFilter in it, which… didn’t work.

MetaFilter failing to load on the reimagined WorldWideWeb.
500? Really?

People were quick to point this out and assume that it was something to do with the modernity of MetaFilter:

honestly, the disheartening thing is that many metafilter pages don’t seem to work. Oh, the modern web.

Some even went so far as to speculate that the reason related to MetaFilter’s use of CSS and JS:

CSS and JS. They do things. Important things.

This is, of course, complete baloney, and it’s easy to prove to oneself. Firstly, simply using the View Source tool in your browser on a MetaFilter page reveals source code that’s quite comprehensible, even human-readable, without going anywhere near any CSS or JavaScript.

MetaFilter in Lynx: perfectly usable browing experience
As late as the early 2000s I’d occasionally use Lynx for serious browsing, but any time I’ve used it since it’s been by necessity.

Secondly, it’s pretty simple to try browsing MetaFilter without CSS or JavaScript enabled! I tried in two ways: first, by using Lynx, a text-based browser that’s never supported either of those technologies. I also tried by using Firefox but with them disabled (honestly, I slightly miss when the Web used to look like this):

MetaFilter in Firefox (with CSS and JS disabled)
It only took me three clicks to disable stylesheets and JavaScript in my copy of Firefox… but I’ll be the first to admit that I don’t keep my browser configured like “normal people” probably do.

And thirdly: the error code being returned by the simulated WorldWideWeb browser is a HTTP code 500. Even if you don’t know your HTTP codes (I mean, what kind of weirdo would take the time to memorise them all anyway <ahem>), it’s worth learning this: the first digit of a HTTP response code tells you what happened:

  • 1xx means “everything’s fine, keep going”;
  • 2xx means “everything’s fine and we’re done”;
  • 3xx means “try over there”;
  • 4xx means “you did something wrong” (the infamous 404, for example, means you asked for a page that doesn’t exist);
  • 5xx means “the server did something wrong”.

Simple! The fact that the error code begins with a 5 strongly implies that the problem isn’t in the (client-side) reimplementation of WorldWideWeb: if this had have been a CSS/JS problem, I’d expect to see a blank page, scrambled content, “filler” content, or incomplete content.

So I found myself wondering what the real problem was. This is, of course, where my geek flag becomes most-visible: what we’re talking about, let’s not forget, is a fringe problem in an incomplete simulation of an ancient computer program that nobody uses. Odds are incredibly good that nobody on Earth cares about this except, right now, for me.

Dan's proposed "Geek Flag"
I searched for a “Geek Flag” and didn’t like anything I saw, so I came up with this one based on… well, if you recognise what it’s based on, good for you, you’re certainly allowed to fly it. If not… well, you can too: there’s no geek-gatekeeping here.

Luckily, I spotted Jeremy’s note that the source code for the WorldWideWeb simulator was now available, so I downloaded a copy to take a look. Here’s what’s happening:

  1. The (simulated) copy of WorldWideWeb is asked to open a document by reference, e.g. “https://www.metafilter.com/”.
  2. To work around same-origin policy restrictions, the request is sent to an API which acts as a proxy server.
  3. The API makes a request using the Node package “request” with this line of code: request(url, (error, response, body) => { ... }).  When the first parameter to request is a (string) URL, the module uses its default settings for all of the other options, which means that it doesn’t set the User-Agent header (an optional part of a Web request where the computer making the request identifies the software that’s asking).
  4. MetaFilter, for some reason, blocks requests whose User-Agent isn’t set. This is weird! And nonstandard: while web browsers should – in RFC2119 terms – set their User-Agent: header, web servers shouldn’t require that they do so. MetaFilter returns a 403 and a message to say “Forbidden”; usually a message you only see if you’re trying to access a resource that requires session authentication and you haven’t logged-in yet.
  5. The API is programmed to handle response codes 200 (okay!) and 404 (not found), but if it gets anything else back it’s supposed to throw a 400 (bad request). Except there’s a bug: when trying to throw a 400, it requires that an error message has been set by the request module and if there hasn’t… it instead throws a 500 with the message “Internal Server Fangle” and  no clue what actually went wrong. So MetaFilter’s 403 gets translated by the proxy into a 400 which it fails to render because a 403 doesn’t actually produce an error message and so it gets translated again into the 500 that you eventually see. What a knock-on effect!
Illustration showing conversation between simulated WorldWideWeb and MetaFilter via an API that ultimately sends requests without a User-Agent, gets a 403 in response, and can't handle the 403 and so returns a confusing 500.
If you’re having difficulty visualising the process, this diagram might help you to continue your struggle with that visualisation.

The fix is simple: simply change the line:

request(url, (error, response, body) => { ... })

to:

request({ url: url, headers: { 'User-Agent': 'WorldWideWeb' } }, (error, response, body) => { ... })

This then sets a User-Agent header and makes servers that require one, such as MetaFilter, respond appropriately. I don’t know whether WorldWideWeb originally set a User-Agent header (CERN’s source file archive seems to be missing the relevant C sources so I can’t check) but I suspect that it did, so this change actually improves the fidelity of the emulation as a bonus. A better fix would also add support for and appropriate handling of other HTTP response codes, but that’s a story for another day, I guess.

I know the hackathon’s over, but I wonder if they’re taking pull requests…

× × × × ×

WorldWideWeb, 30 years on

This month, a collection of some of my favourite geeks got invited to CERN in Geneva to participate in a week-long hackathon with the aim of reimplementing WorldWideWeb – the first web browser, circa 1990-1994 – as a web application. I’m super jealous, but I’m also really pleased with what they managed to produce.

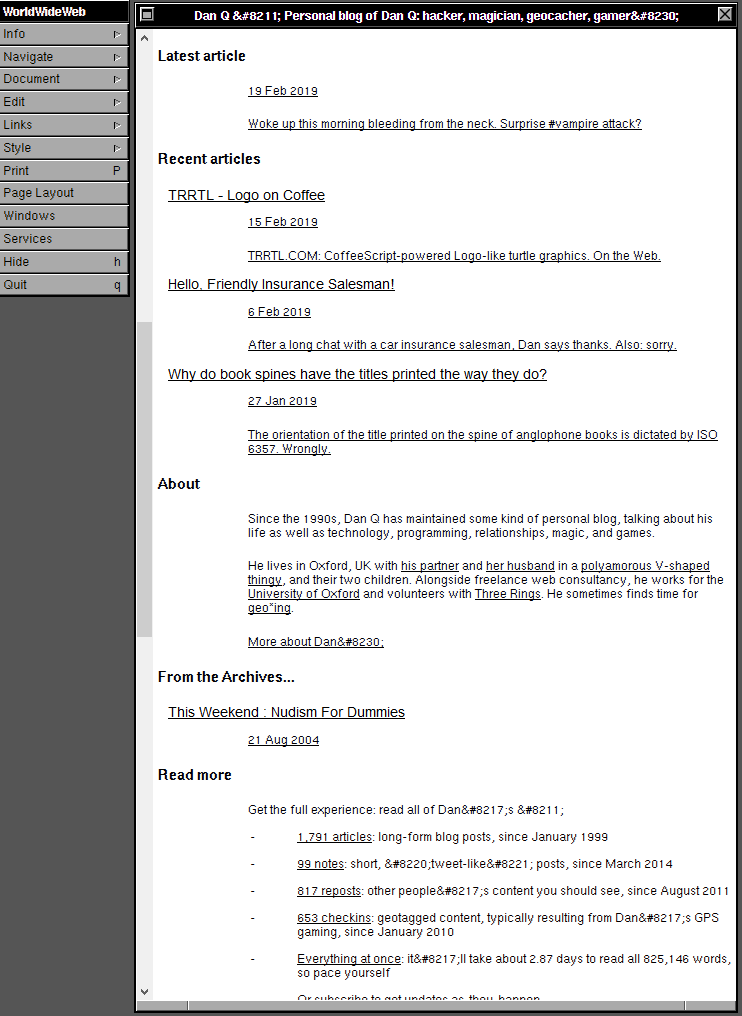
DanQ.me as displayed by the reimagined WorldWideWeb browser circa 1990
With the exception of a few character entity quirks, this site remains perfectly usable in the simulated WorldWideWeb browser. Clearly I wasn’t the only person to try this vanity-check…

This represents a huge leap forward from their last similar project, which aimed to recreate the line mode browser: the first web browser that didn’t require a NeXT computer to run it and so a leap forward in mainstream appeal. In some ways, you might expect reimplementing WorldWideWeb to be easier, because its functionality is more-similar that of a modern browser, but there were doubtless some challenges too: this early browser predated the concept of the DOM and so there are distinct processing differences that must be considered to get a truly authentic experience.

Geeks hacking on WorldWideWeb reborn
It’s just like any other hackathon, if you ignore the enormous particle collider underneath it.

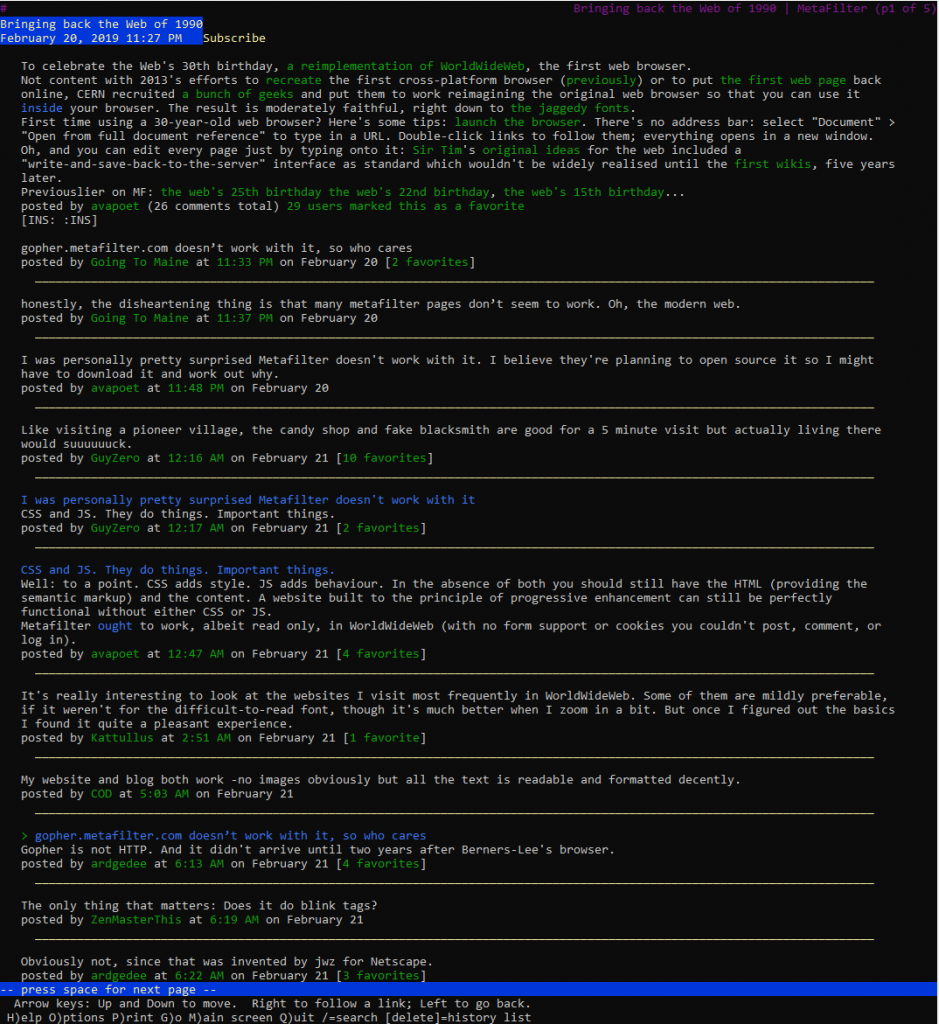
Among their outputs, the team also produced a cool timeline of the Web, which – thanks to some careful authorship – is as legible in WorldWideWeb as it is in a modern browser (if, admittedly, a little less pretty).

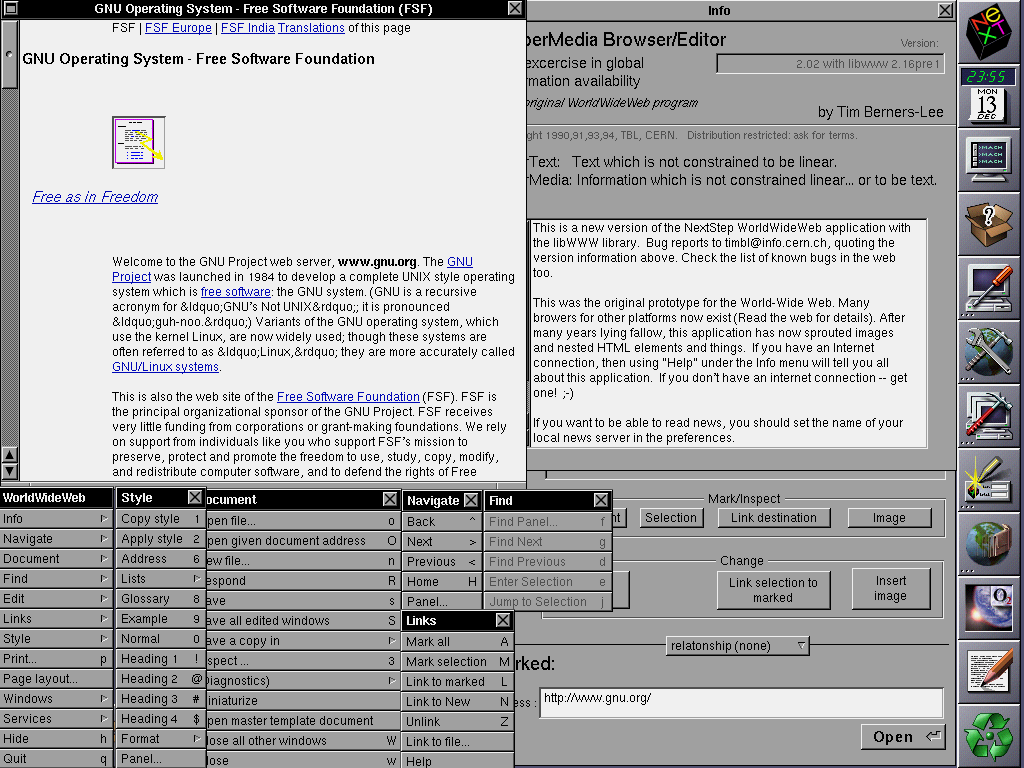
WorldWideWeb screenshot by Sir Tim Berners-Lee
When Sir Tim took this screenshot, he could never have predicted the way the Web would change, technically, over the next 25-30 years. But I’m almost more-interested in how it’s stayed the same.

In an age of increasing Single Page Applications and API-driven sites and “apps”, it’s nice to be reminded that if you develop right for the Web, your content will be visible (sort-of; I’m aware that there are some liberties taken here in memory and processing limitations, protocols and negotiation) on machines 30 years old, and that gives me hope that adherence to the same solid standards gives us a chance of writing pages today that look just as good in 30 years to come. Compare that to a proprietary technology like Flash whose heyday 15 years ago is overshadowed by its imminent death (not to mention Java applets or ActiveX <shudders>), iOS apps which stopped working when the operating system went 64-bit, and websites which only work in specific browsers (traditionally Internet Explorer, though as I’ve complained before we’re getting more and more Chrome-only sites).

The Web is a success story in open standards, natural and by-design progressive enhancement, and the future-proof archivability of human-readable code. Long live the Web.

Update 24 February 2019: After I submitted news of the browser to MetaFilter, I (and others) spotted a bug. So I came up with a fix…

× × ×

Programming is just solving puzzles

This article is a repost promoting content originally published elsewhere. See more things Dan's reposted.

‘Programming is just solving puzzles’ – Nominet (Nominet)

As a child, I wanted to be a botanical researcher. I loved being outdoors and used to visit the botanical gardens near my house all the time. My grandma inspired me to change my mind and helped me get interested in science. She lived in the country and we would look at the stars together,…

Ruth Trevor-Allen

As a child, I wanted to be a botanical researcher. I loved being outdoors and used to visit the botanical gardens near my house all the time. My grandma inspired me to change my mind and helped me get interested in science. She lived in the country and we would look at the stars together, which led to an early fascination in astronomy.

Unusually for the era, both my grandmothers had worked in science: one as a lab technician and one as a researcher in speech therapy. I have two brothers, but neither went into technology as a career. My mum was a vicar and my dad looked after us kids, although he had been a maths teacher.

My aptitude for science and maths led me to study physics at university, but I didn’t enjoy it, and switched to software engineering after the first year. As soon as I did my first bit of programming, I knew this was what I had been looking for. I like solving problems and building stuff that works, and programming gave me the opportunity to do both. It was my little eureka moment.

Wise words from my partner on her workplace’s blog as part of a series of pieces they’re doing on women in technology. Plus, a nice plug for Three Rings there (thanks, love!).

Finding Lena Forsen, the Patron Saint of JPEGs

This article is a repost promoting content originally published elsewhere. See more things Dan's reposted.

Lena, then and now

Every morning, Lena Forsen wakes up beneath a brass-trimmed wooden mantel clock dedicated to “The First Lady of the Internet.”

It was presented to her more than two decades ago by the Society for Imaging Science and Technology, in recognition of the pivotal—and altogether unexpected—role she played in shaping the digital world as we know it.

Among some computer engineers, Lena is a mythic figure, a mononym on par with Woz or Zuck. Whether or not you know her face, you’ve used the technology it helped create; practically every photo you’ve ever taken, every website you’ve ever visited, every meme you’ve ever shared owes some small debt to Lena. Yet today, as a 67-year-old retiree living in her native Sweden, she remains a little mystified by her own fame. “I’m just surprised that it never ends,” she told me recently.

While I’m not sure that it’s fair to say that Lena “remained a mystery” until now – the article itself identifies several events she’s attended in her capacity of “first lady of the Internet” – but this is still a great article about a picture that you might have seen but never understood the significance of nor the person in front of the lens. Oh, and it’s pronounced “lee-na”; did you know?

Why isn’t the internet more fun and weird?

This article is a repost promoting content originally published elsewhere. See more things Dan's reposted.

Why isn’t the internet more fun and weird? (jarredsumner.com)

MySpace inspired a generation of teenagers to learn how to code. We have Dark Mode now, but where did all the glitter go?

During the internet of 2006, consumer products let anyone edit CSS. It was a beautiful mess. As the internet grew up, consumer products stopped trusting their users, and the internet lost its soul.

I agree entirely with Jarred: in discouraging people from having their own web presences and in locking-down our shared social spaces online, we’re making the Web feel increasingly flat, soulless, and – dare I say is – joyless. MDX seems really cool, but I’m not yet convinced that it alone solves the underlying problem of content creators feeling that they should (or must) use dry, boring silos for the things they produce rather than their own space (in which they’d be able to express their personalities and the personality of the things they were sharing). It may well lower the barrier to producing interactive personal sites a little (as well as having other applications, I’m sure!), but we’re going to need more than that to drag people away from Facebook, Medium, Twitter and the like.

CSS-driven console graphics

If you’re reading this post via my blog and using a desktop computer, try opening your browser’s debug console (don’t worry; I’ll wait). If you don’t know how, here’s instructions for Firefox and instructions for Chrome. Other browsers may vary. You ought to see something like this in your debugger:

Debug console on DanQ.me showing Dan's head and a speech bubble.
I’m in your console, eating your commands!

What sorcery is this?

The debug console is designed to be used by web developers so that they can write Javascript code right in their browser as well as to investigate any problems with the code run by a web page. The web page itself can also output to the console, which is usually used for what I call “hello-based debugging”: printing out messages throughout a process so that the flow and progress can be monitored by the developer without having to do “proper” debugging. And it gets used by some web pages to deliver secret messages to any of the site users who open their debugger.

Facebook console messaging advising against the use of the console.
Facebook writes to the console a “stop” message, advising against using the console unless you know what you’re doing in an attempt to stop people making themselves victims of console-based social engineering attacks.

Principally, though, the console is designed for textual content and nothing else. That said, both Firefox and Chrome’s consoles permit the use of CSS to style blocks of debug output by using the %c escape sequence. For example, I could style some of a message with italic text:

>> console.log('I have some %citalic %ctext', 'font-style: italic;', '');
   I have some italic text

Using CSS directives like background, then, it’s easy to see how one could embed an image into the console, and that’s been done before. Instead, though, I wanted to use the lessons I’d learned developing PicInHTML 8¾ years ago to use text and CSS (only) to render a colour picture to the console. First, I created my template image – a hackergotchi of me and an accompanying speech bubble, shrunk to a tiny size and posterised to reduce the number of colours used and saved as a PNG.

Hackergotchi of Dan with a speech bubble, "squashed".
The image appears “squashed” to compensate for console monospace letters not being “square”.

Next, I wrote a quick Ruby program, consolepic.rb, to do the hard work. It analyses each pixel of the image and for each distinct colour assigns to a variable the CSS code used to set the background colour to that colour. It looks for “strings” of like pixels and combines them into one, and then outputs the Javascript necessary to write out all of the above. Finally, I made a few hand-tweaks to insert the text into the speech bubble.

The resulting output weighs in at 31.6kB – about a quarter of the size of the custom Javascript on the frontend of my site and so quite a bit larger than I’d have liked and significantly less-efficient than the image itself, even base64-encoded for embedding directly into the code, but that really wasn’t the point of the exercise, was it? (I’m pretty sure there’s significant room for improvement from a performance perspective…)

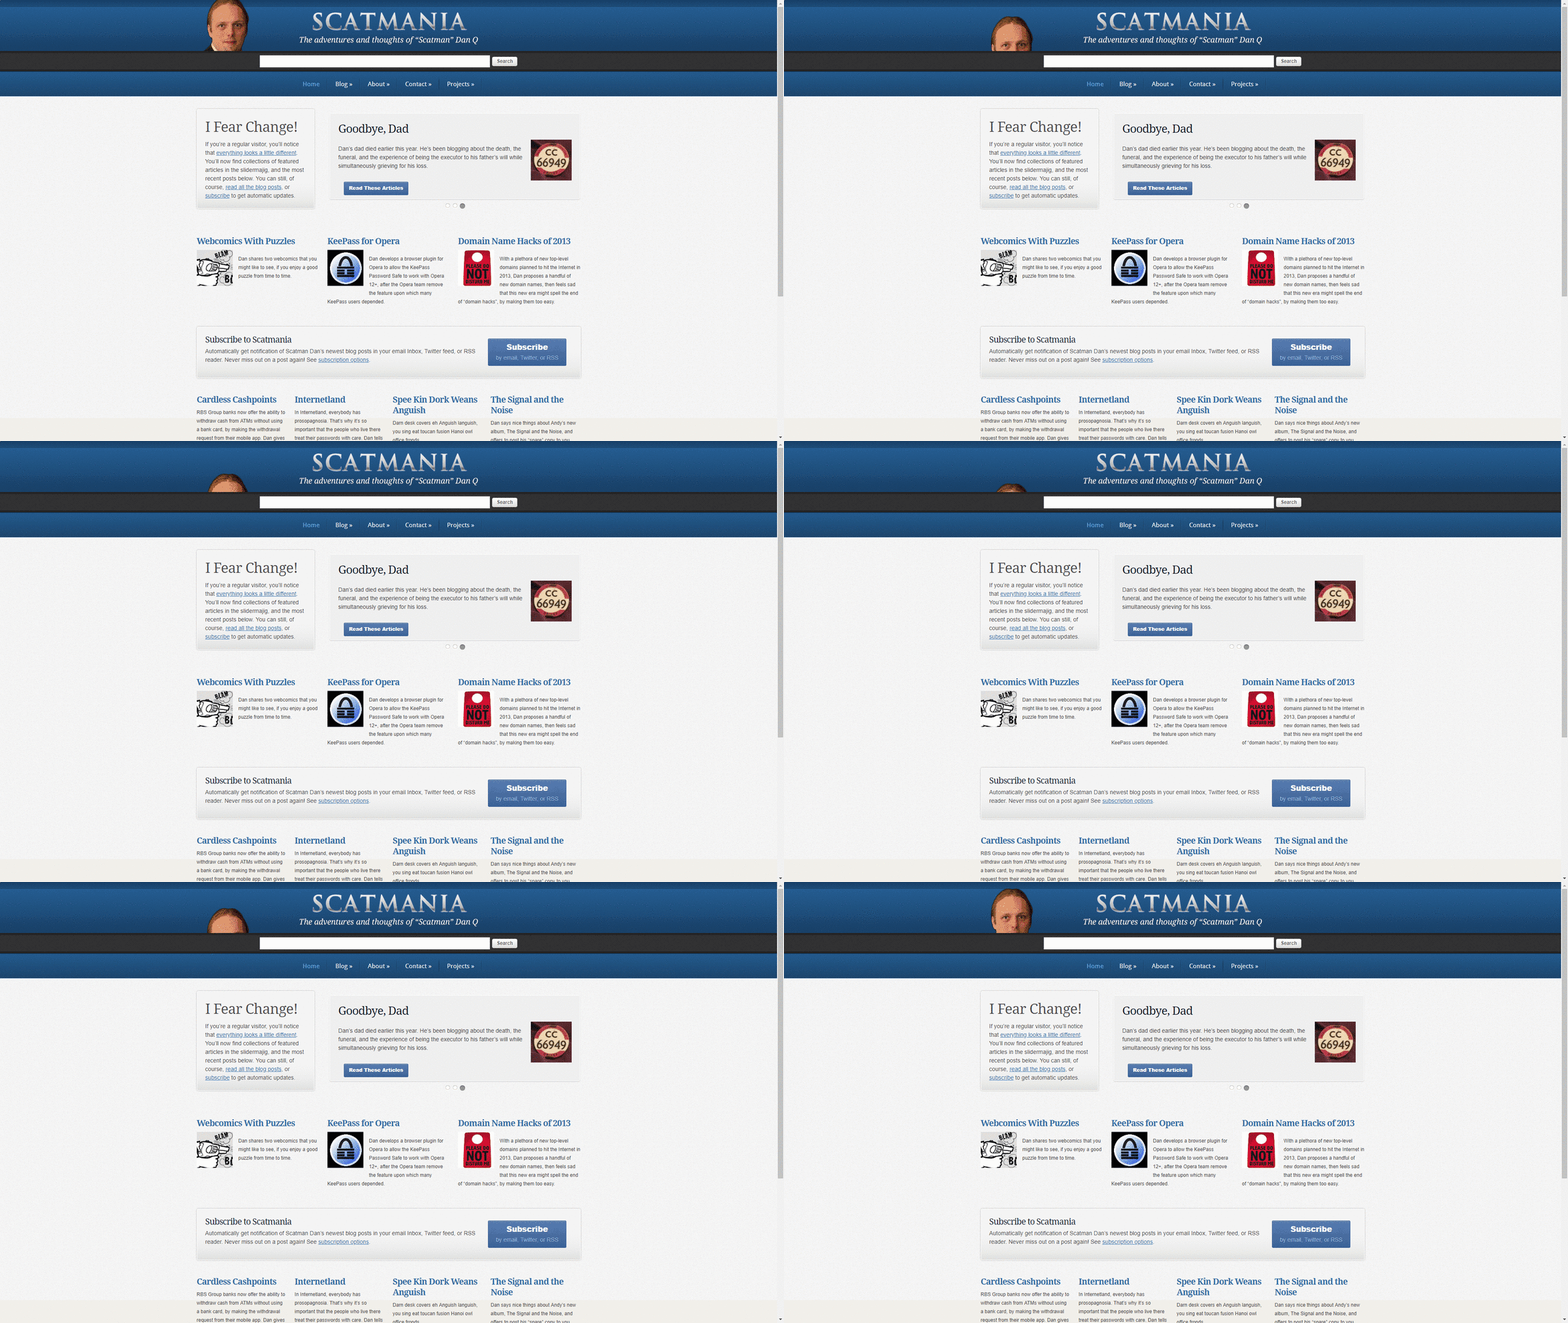
Scatmania.org in 2012
I’ll be first to admit it’s not as cool as the “pop-up Dan” in the corner of my 2012 design. You might enjoy my blog post about my 20 years of blogging or the one about how “pop-up Dan” worked.

What it achieved was an interesting experiment into what can be achieved with Javascript, CSS, the browser console, and a little imagination. An experiment that can live here on my site, for anybody who looks in the direction of their debugger, for the foreseeable future (or until I get bored of it). Anybody with any more-exotic/silly ideas about what this technique could be used for is welcome to let me know!

Update: 17 April 2019 – fun though this was, it wasn’t worth continuing to deliver an additional 25% Javascript payload to every visitor just for this, so I’ve stopped it for now. You can still read the source code (and even manually run it in the console) if you like. And I have other ideas for fun things to do with the console, so keep an eye out for that…

× × × ×

Pong

I’ve recently been reimplementing retro arcade classic Pong to show off during a celebration of World Digital Preservation Day 2018 yesterday at the Bodleian Libraries. Here’s how that went down.

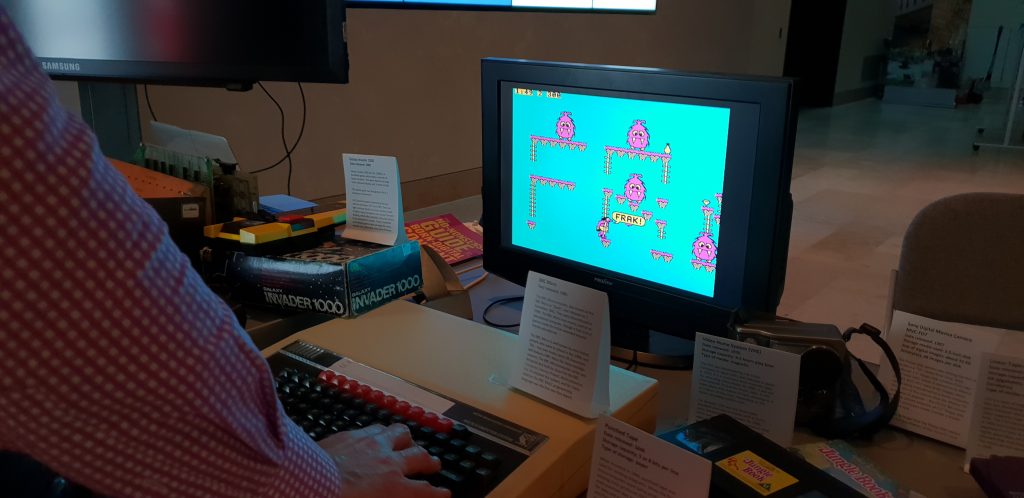
Frak on the BBC Micro, amongst the rest of a pile of computing nostalgia
The Bodleian has a specific remit for digital archiving… but sometimes they just like collecting stuff, too, I’m sure.

The team responsible for digital archiving had plans to spend World Digital Preservation Day running a stand in Blackwell Hall for some time before I got involved. They’d asked my department about using the Heritage Window – the Bodleian’s 15-screen video wall – to show a carousel of slides with relevant content over the course of the day. Or, they added, half-jokingly, “perhaps we could have Pong up there as it’ll be its 46th birthday?”

Parts of the Digital Archiving display table
Free reign to play about with the Heritage Window while smarter people talk to the public about digital archives? Sure, sign me up.

But I didn’t take it as a joke. I took it as a challenge.

Emulating Pong is pretty easy. Emulating Pong perfectly is pretty hard. Indeed, a lot of the challenge in the preservation of (especially digital) archives in general is in finding the best possible compromise in situations where perfect preservation is not possible. If these 8″ disks are degrading, is is acceptable to copy them onto a different medium? If this video file is unreadable in modern devices, is it acceptable to re-encode it in a contemporary format? These are the kinds of questions that digital preservation specialists have to ask themselves all the damn time.

Pong prototype with a SNES controller on my work PC
The JS Gamepad API lets your web browser talk to controller devices.

Emulating Pong in a way that would work on the Heritage Window but be true to the original raised all kinds of complications. (Original) Pong’s aspect ratio doesn’t fit nicely on a 16:9 widescreen, much less on a 27:80 ultrawide. Like most games of its era, the speed is tied to the clock rate of the processor. And of course, it should be controlled using a “dial”.

By the time I realised that there was no way that I could thoroughly replicate the experience of the original game, I decided to take a different track. Instead, I opted to reimplement Pong. A reimplementation could stay true to the idea of Pong but serve as a jumping-off point for discussion about how the experience of playing the game may be superficially “like Pong” but that this still wasn’t an example of digital preservation.

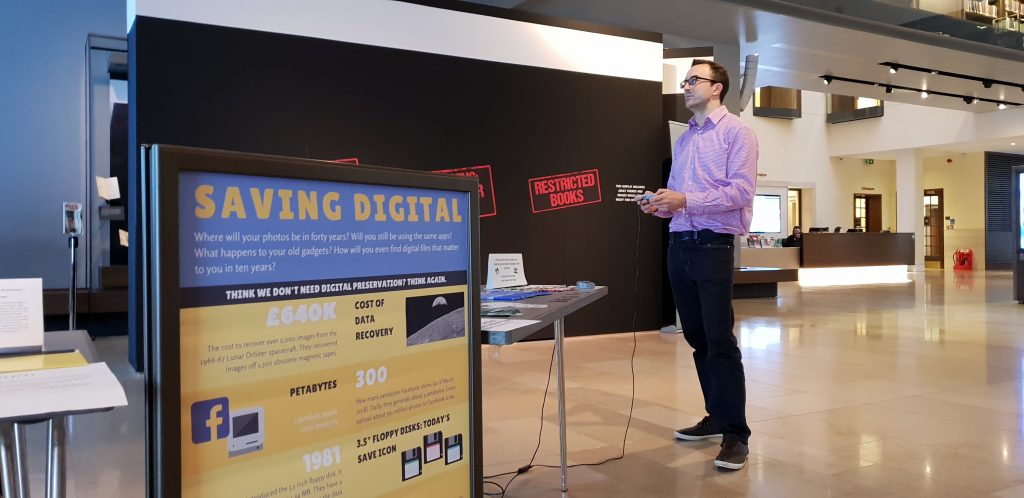
Two participants play Pong on the Heritage Window
Bip… boop… boop… bip… boop… bip…

Here’s the skinny:

  • A web page, displayed full-screen, contains both a <canvas> (for the game, sized appropriately for a 3 × 3 section of the video wall) and a <div> full of “slides” of static content to carousel alongside (filling a 2 × 3 section).
  • Javascript writes to the canvas, simulates the movement of the ball and paddles, and accepts input from the JS Gamepad API (which is awesome, by the way). If there’s only one player, a (tough! – only three people managed to beat it over the course of the day!) AI plays the other paddle.
  • A pair of SNES controllers adapted for use as USB controllers which I happened to own already.
My Javascript-powered web applications dominate the screens in Blackwell Hall.
Increasingly, the Bodleian’s spaces seem to be full of screens running Javascript applications I’ve written.

I felt that the day, event, and game were a success. A few dozen people played Pong and explored the other technology on display. Some got nostalgic about punch tape, huge floppy disks, and even mechanical calculators. Many more talked to the digital archives folks and I about the challenges and importance of digital archiving. And a good time was had by all.

I’ve open-sourced the entire thing with a super-permissive license so you can deploy it yourself (you know, on your ultrawide video wall) or adapt it as you see fit. Or if you’d just like to see it for yourself on your own computer, you can (but unless you’re using a 4K monitor you’ll probably need to use your browser’s mobile/responsive design simulator set to 3200 × 1080 to make it fit your screen). If you don’t have controllers attached, use W/S to control player 1 and the cursor keys for player 2 in a 2-player game.

Happy 46th birthday, Pong.

× × × × ×

Linda Liukas, Hello Ruby and the magic of coding

This article is a repost promoting content originally published elsewhere. See more things Dan's reposted.

Linda Liukas’s best-selling Hello Ruby books teach children that computers are fun and coding can be a magical experience.

See the original article to watch a great video interview with Linda Liukas. Linda is the founder of Rails Girls and author of a number of books encouraging children to learn computer programming (which I’m hoping to show copies of to ours, when they’re a tiny bit older). I’ve mentioned before how important I feel an elementary understanding of programming concepts is to children.

The Ruby Story

This article is a repost promoting content originally published elsewhere. See more things Dan's reposted.

By 2005, Ruby had become more popular, but it was still not a mainstream programming language. That changed with the release of Ruby on Rails. Ruby on Rails was the “killer app” for Ruby, and it did more than any other project to popularize Ruby. After the release of Ruby on Rails, interest in Ruby shot up across the board, as measured by the TIOBE language index:

It’s sometimes joked that the only programs anybody writes in Ruby are Ruby-on-Rails web applications. That makes it sound as if Ruby on Rails completely took over the Ruby community, which is only partly true. While Ruby has certainly come to be known as that language people write Rails apps in, Rails owes as much to Ruby as Ruby owes to Rails.

As an early adopter of Ruby (and Rails, when it later came along) I’ve always found that it brings me a level of joy I’ve experienced in very few other languages (and never as much). Every time I write Ruby, it takes me back to being six years old and hacking BASIC on my family’s microcomputer. Ruby, more than any other language I’ve come across, achieves the combination of instant satisfaction, minimal surprises, and solid-but-flexible object orientation. There’s so much to love about Ruby from a technical perspective, but for me: my love of it is emotional.

×

Learning BASIC Like It’s 1983

This article is a repost promoting content originally published elsewhere. See more things Dan's reposted.

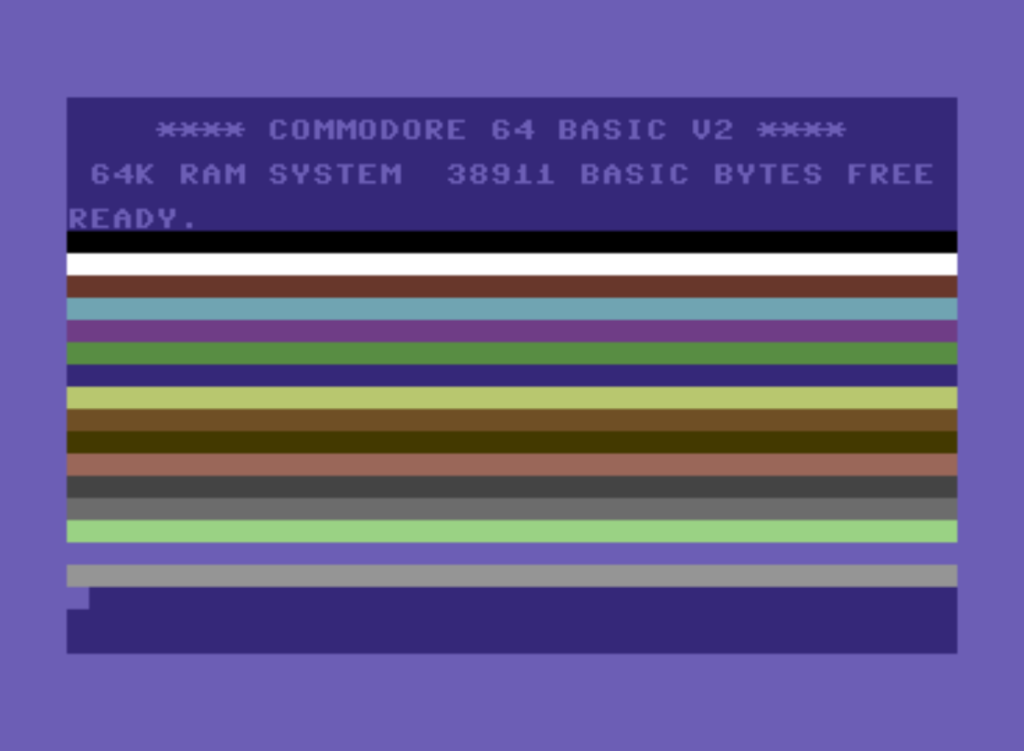
C64 showing coloured barsNow, it’s Saturday morning and you’re eager to try out what you’ve learned. One of the first things the manual teaches you how to do is change the colors on the display. You follow the instructions, pressing CTRL-9 to enter reverse type mode and then holding down the space bar to create long lines. You swap between colors using CTRL-1 through CTRL-8, reveling in your sudden new power over the TV screen.

As cool as this is, you realize it doesn’t count as programming. In order to program the computer, you learned last night, you have to speak to it in a language called BASIC. To you, BASIC seems like something out of Star Wars, but BASIC is, by 1983, almost two decades old. It was invented by two Dartmouth professors, John Kemeny and Tom Kurtz, who wanted to make computing accessible to undergraduates in the social sciences and humanities. It was widely available on minicomputers and popular in college math classes. It then became standard on microcomputers after Bill Gates and Paul Allen wrote the MicroSoft BASIC interpreter for the Altair. But the manual doesn’t explain any of this and you won’t learn it for many years.

One of the first BASIC commands the manual suggests you try is the PRINT command. You type in PRINT "COMMODORE 64", slowly, since it takes you a while to find the quotation mark symbol above the 2 key. You hit RETURN and this time, instead of complaining, the computer does exactly what you told it to do and displays “COMMODORE 64” on the next line.

Now you try using the PRINT command on all sorts of different things: two numbers added together, two numbers multiplied together, even several decimal numbers. You stop typing out PRINT and instead use ?, since the manual has advised you that ? is an abbreviation for PRINT often used by expert programmers. You feel like an expert already, but then you remember that you haven’t even made it to chapter three, “Beginning BASIC Programming.”

I had an Amstrad CPC, myself, but I had friends with C64s and ZX Spectrums and – being slightly older than the author – I got the opportunity to experiment with BASIC programming on all of them (and went on to write all manner of tools on the CPC 464, 664, and 6128 models). I’m fortunate to have been able to get started in programming in an era when your first experience of writing code didn’t have to start with an examination of the different language choices nor downloading and installing some kind of interpreter or compiler: microcomputers used to just drop you at a prompt which was your interpreter! I think it’s a really valuable experience for a child to have.

×

What’s The Longest Word You Can Write With Seven-Segment Displays?

This article is a repost promoting content originally published elsewhere. See more things Dan's reposted.

From now on, when I try to engage junior programmers with the notion that they should make use of their general-purpose computers to answer questions for them… no matter how silly the question?… I’ll show them this video. It’s a moderately-concise explanation of the thought processes and programming practice involved in solving a simple, theoretical problem, and it does a great job at it.